
 Artisan bread continues to grow in popularity as consumers shift their food spending toward authentic, clean label products. This presents a huge opportunity for commercial and industrial bakeries — consumers not only want more artisan products, they’re also willing to pay more for them. But, it also presents challenges because artisan breads need to be handled differently from industrially produced sandwich breads during the production process.
Here, we take a brief look at the growing demand for artisan breads and the challenges of manufacturing these products on an industrial scale. We then review the types of equipment needed for a complete artisan bread production line.
Opportunities and challenges in artisan bread
Clean label, organic, better-for-you — these are just some of the current food trends driving demand for premium products, including artisan breads. Sales in the artisan category have continued to grow even as traditional bread sales flatline or decline. This growth will likely continue as Millennials and Generation Z gain more spending power. Ample research has shown that these younger consumers are more likely than members of older generations to spend more on premium foods.
Artisan bread presents challenges for large-scale production because the way it’s produced is in many ways the opposite of industrial breadmaking. To understand this, we need to dive briefly into the category definition.
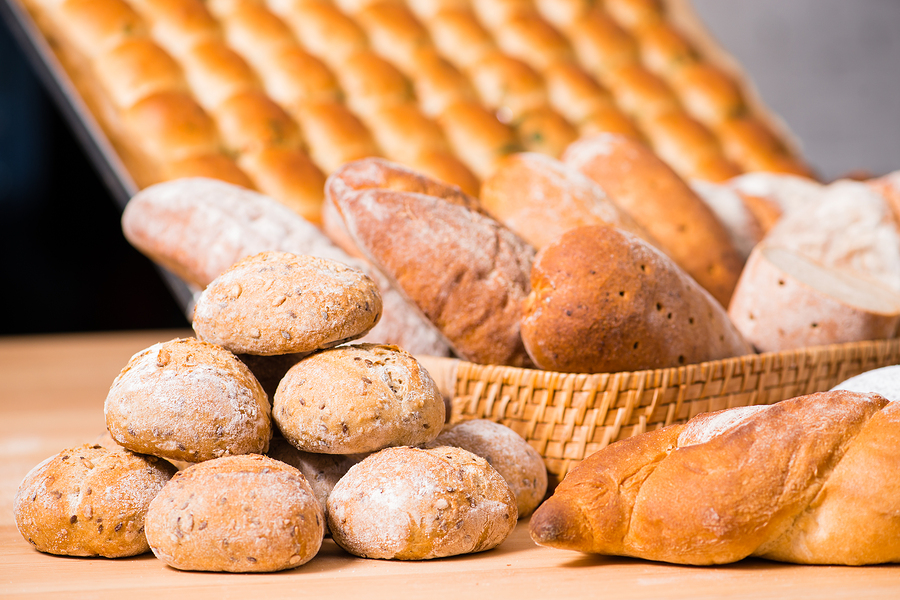
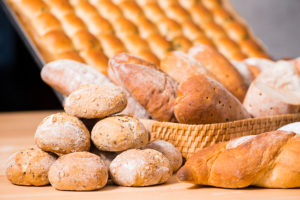
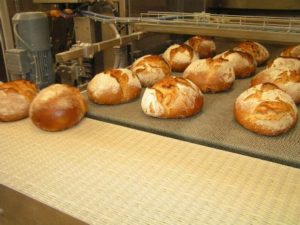
 Artisan bread doesn’t have a strict definition. The term describes a style of fresh bread made with minimal ingredients (i.e., flour, water, salt, and yeast) and using traditional processing techniques. The dough usually has a high water content and requires long fermentation times.
Because artisan breads don’t have the additives and preservatives found in most packaged sandwich bread, the dough needs to be handled more gently. For example, you want to avoid stretching the dough too much or dropping it from too great a height between conveyors. Also — and this is key — the process can’t be rushed.
Jon Thompson, Naegele’s western regional sales manager, who’s been in the business for decades, started seeing interest in machines to produce artisan bread on a commercial level in the early-to-mid ‘90s. Before that, industrial bread production had focused on shorter processing times and increased output. To meet the burgeoning demand for products that look and taste hand-crafted, bakers had to go back to the drawing board with their ingredients and OEMs had to retool their equipment to handle the different types of dough used to make these products.
The success of this effort can be seen in the bakery department of your average grocery store. Thompson sums it up like this:
“Traditionally, in an artisan bakery, a baguette could easily cost $4 or $5. Now, you can go into a supermarket and get a high-quality baguette for $1.98. Equipment innovations have brought the price down to where anyone can enjoy artisan-type products — whether it’s a loaf, rolls, or a baguette — because they’re produced using a more consumer-friendly process.”
Production equipment for a complete artisan bread line
The biggest challenge with artisan bread doughs is their high water content. In some cases, the hydration level (water to flour ratio) can be as high as 80% to 90%. This gives the dough a loose structure and makes it very sticky, which traditional forming and dividing equipment isn’t designed to handle.
Let’s walk through the steps in industrial artisan bread production and explore how today’s equipment helps bakers meet its unique challenges.
Mixing and floor time
The first step of any bread process is mixing the ingredients together. This step happens before the dough enters the automated production line.
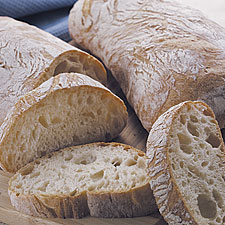
After the ingredients are mixed together, the dough is transferred to a temperature- and humidity-controlled container or trough to rest. This phase is known as “floor time,” and it’s when the yeast ferments and releases carbon dioxide into the dough, creating the bread’s crumb structure. Sandwich bread has a close, or tight, crumb structure, meaning very small holes, while artisan bread typically has an open crumb structure, or large holes. Achieving an open crumb structure takes time, so artisan bread is usually allowed to rest until it roughly doubles in size.
Once the dough achieves the desired size, it enters an automated line that takes it through the forming, proofing, baking, packaging, and (if necessary) freezing.
Chunking and rolling
The first machine in the automated bread line is a chunker. The dough is dumped out of the mixing bowls or dough troughs into the chunker, which divides the dough into pieces. Those pieces are then dropped onto a conveyor, which transports them to the dough feeder. The chunker positions the chunks so that they overlap slightly, almost like shingles, to create a continuous dough sheet.
At this stage, the dough enters the makeup section of the line.
First, the dough feeder takes the overlapping chunks of dough and turns them into a dough sheet with a consistent width and thickness. This is done using a series of vertically positioned rollers that gently pull the sheet down and gradually reduce its thickness at the same time.
During this stage, the dough must be handled very carefully because you don’t want to degas it and cause it to lose its open crumb structure. That’s why you need equipment specifically designed for wet, highly fermented dough.
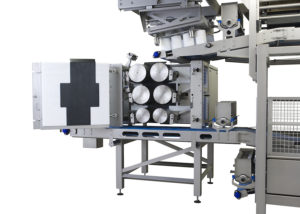 For example, the dough feeding head on the DrieM Sheeting Line has three sets of offset rollers, two of which are adjustable horizontally, rather than the two sets commonly found on traditional pan bread lines. For stronger doughs, like sandwich loaves, those two rollers are set in a position so they can use gravity can assist the dough flow through the dough feeder. But looser artisan-style doughs need the extra support of the offset adjustable rollers in a different position. Otherwise, the liquid dough will pour right through, stretching and breaking on its way down to the conveyor.
Once you have your continuous dough sheet, the next task is to reduce its thickness and make it wider so that you’ll have more useable area to work with for cutting or forming the dough down the line. This is achieved using a system of reduction rollers and a uniquely designed cross roller. In contrast to a traditional cross roller, which presses down on the dough sheet, this cross roller gently widens the dough sheet without degassing it. For example, say you have a dough sheet that’s 16 inches wide and 2 inches thick and you want it to be 1 inch thick. The reduction rollers and cross roller will gently stretch the dough without working it too much, so it will retain the gas necessary for the desired crumb structure.
Cutting
Once the dough sheet has reached its desired width, it’s transferred to a cutting system that divides the sheet into long strips, and then to a separating system, which spreads the strips apart. The strips are then sent through the guillotine cutter, which cuts them into the desired size for the final product (loaf, roll, etc.).
A key piece of equipment on this portion of the line is the weighing system. This system continually weighs the dough sheets and sends signals to the guillotine cutter to speed up or slow down based on the weight. This ensures consistent portions of dough every time.
The overall process looks like this:

At this point, the dough could be reduced again or widened into a longer piece. Or, if it doesn’t need to be molded, it could go directly to the panning section of the line (Ciabatta is typically put directly into the pan). But most products will then proceed to the molding system.
Molding, panning, proofing, and scoring
The molding system is where the dough is formed into its final shape. Loaves are formed using curling chains and/or press boards.
An optional step at this point is seeding. After the loaf is molded, it will move to a seeding conveyor, which applies a small amount of water to the product and then enrobes it in seeds. This is so common that most complete artisan bread lines have a seeding section, even if it isn’t always in use — for products with no seeds, this area just acts like a conveyor.
After making their way through the seeding section, freestanding loaves are put onto peel boards, while pan breads are put into pans.
From here, the loaves head to the proofer. Proofing is another phase that can’t be rushed. Traditional sandwich breads may stay in the proofer for only 30 or 40 minutes, but it isn’t uncommon for artisan breads (e.g., baguettes and flatbreads) to proof for as long as 5 hours. Some artisan-style bakers even use a retarder proofer, which maintains a lower temperature and humidity so you can proof the bread for 20 hours or more. As you can see, the systems you need to produce high-quality artisan bread can be very extensive!
After proofing, it’s common for loaves to be scored — for example, five diagonal cuts on a baguette or a single cut down the middle of a freestanding loaf. This can be done using a scoring system, which has sensors that measure the length, width, and height of each loaf and then create cuts of a predetermined length and angle.
 Baking and cooling
Our bread is now ready to bake!
Loaves in pans can be placed directly into the oven, while loaves on peelboards are moved onto a conveyor by a machine called a scrabbler. The conveyor transfers the loaves to the oven plate.
After baking, the loaves are depanned. There are several options for depanning:
- Gravity — for peelboards
- Vacuum suction depanners — for pan bread
- Needle depanners — for pan bread
- Finger depanners — The Kaak Group offers a finger depanner, which is a machine with small plastic fingers that grip the bread and move it to the conveyor. This aids in cooling because the loaves are placed at a sufficient distance from one another to provide airflow between and around them.
The depanner deposits the loaves onto a cooling spiral or cooling conveyor, where they’re allowed to cool completely. They can then be frozen, sliced, or bagged, depending on the product.
Variations on the process
The walk-through above provides a picture of a generic automated production line for artisan-style breads, but there are many variations possible.
We already mentioned the seeding section, which can easily be turned on or off as required. There are also different types of dividers and molders, as well as ovens and cooling equipment. Processes at the very beginning of line, like flour dispensing and ingredient weighing, can be automated, as can processes at the end of the line, like pan stacking. Larger facilities often have automated fermentation systems as well as systems for mixing and handling poolish (aka starter dough).
Overall, larger companies tend to have the highest degrees of automation, but mid-sized and even smaller companies are starting to rapidly adopt these systems. This is particularly true in areas like California, where the minimum wage is high and rising. Margins on baked goods are low already, and automation is a popular solution to the challenge of increasing labor costs.
Whether you’re just starting out with artisan-style breads or you’re looking to upgrade your existing line, we can help. Click here to get in touch with our team of experts.